Showing posts with label beauty secret. Show all posts

September 4, 2012

my new face regimen

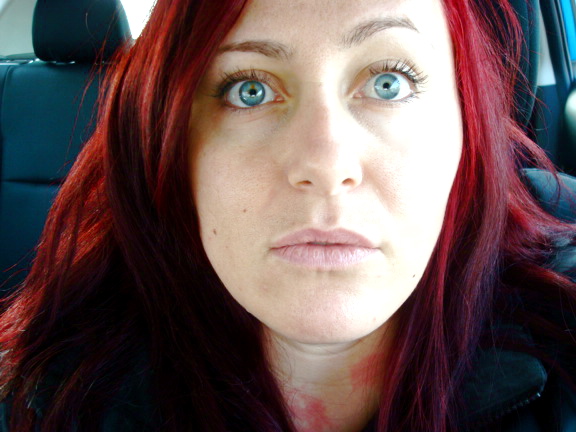
It's been a few weeks since I've switched up my face care routine and I decided to post about it since I feel that I've received some positive results. I want to share the love. I've gone almost completely all natural. I don't know why I never did this before since I have really sensitive skin. about 10 years ago I did have a revelation and stopped washing me face everyday and that seemed to help out a lot. I know they tell you to wash your face everyday but it just wasn't working out for me it would leave my face dry and red and I end up breaking out even more. I was reading Cakies blog when I saw this and decided to give it a try. I've always sort of scoffed at natural face remedies until now.

This DIY face wash is a really great exfoliator and smells great too. The oatmeal and honey leaves my face feeling really soft. I wasn't sure about the honey at first because I though it would leave my skin sticky but this mixture doesn't do that at all. I also decided to leave the lavender out because I have allergies and didn't think it would be a good idea to put dried flowers on my face although I think it would smell really great with it in there.
the basics:
1 T baking soda
2 T oatmeal
1 T dried lavender (optional: I left this out)

ground up and mix together and put in a jar or some sort of container
to use: add a bit of raw honey to palm and then add a teaspoon of dry mix to make a paste and mix with warm water and scrub face with it

I've also been using this DIY face toner after I wash my face and it has really been helping my skin out a lot and most importantly with evening out my skin tone. I have sun damage on my face and am getting more and more dark patches and dark spots as I get older and it seems to really help even them out. I love it! I wasn't thrilled about putting vinegar on my face because it smells like feet but the smell doesn't last long at all I swear. 

DIY toner:
3 parts water
2 parts braggs vinegar with the mother in it
mix and shake toget in a little container or spray bottle

I shake min up every time and put some on a cotton face pad and put it all over my face and neck. It feels really, really good. I never thought I would ever say that.

Happy cleansing!

July 14, 2011

DIY Week - Manicure


about a week ago I did this

for the gold dots and white scalloped (i use that term loosely since, well, look at it) french tips-ish edges I used acrylic paint and a paint brush but the base is mint sorbet nail polish

also don't ask me what it's suppose to resemble because I'm at a loss myself

 this is the fucking WORST when you dig your freshly painted nails

these are my favorite colors right now
{L to R: mint sorbet, slick slate (I saw this on my SIL and ran out to copy here), mint sprint}

February 24, 2011

What's in my makeup bag?

Usually it doesn't consist of much because most days I go with out makeup - not because I think I am a natural beauty like that but because I am lazy and don't care if I'm wearing makeup at work. But on days when I put forth an effort this is what I use. I have this friend Jamie that I work with and we are always talking about the beauty products we buy. We are both very into it. She tells me about any new things she finds and vis-versa.

If you're not a makeup person but need a pick-me-up by simply just putting on mascara that day can make you look a bit more perky. I've read this over and over again in magazines but it holds true. I love nice mascara and I splurged on mine but when I can't do that I love buying the simple pink and green tube.


Left to Right: Compact mirror, Stila major MAJOR mascara, face brush for foundation, TARTE blushing bride cheek stain, bareMinerals matte foundation with SPF 15, Cover Girl brow pencil, Hollywood Glow highlighter, Sephora liquid eyeliner, makeup bag is from Forever 21

When I don't wear makeup often I try to take care of my skin because I have sensitive skin I have tried all sorts of products and everything I use doesn't irritate my skin. The below items I try and put on daily. The Clinque facial lotion I wear every single day and it lasts forever. I just love the way it makes my skin feel; not oily or greasy but very soft and clean.


Clean & Clear for nasty pimples, gen m night repair for bedtime and Clinique face lotion for every day


Related posts:

February 17, 2011

Beauty Tip - DIY Hair Coloring


I'm not an expert NOR did I go to cosmetology school so if you'd rather not listen to me on this one that is fine. I don't blame you. Although, with the little bit of trouble I had getting my hair color to go the red that I wanted it to go it did end up turning out great.

I will say (horn tooting) that I have been dying my hair since high school by myself and have never ruined it. It's never fallen out or burned up into a frizzy mess. (my hair is unfortunately frizzy all on it's own)

My hair had been dyed black for years before I decided to try red which was the primary reason it didn't take the first time. My ends actually are still darker than the top but I get compliments almost every day on it. People ask me how I got it to turn out like that and I just laugh. It wasn't on purpose. I'm not bragging - well I kind of am but I am not trying to lead you astray. I'm just glad this process worked for me.

I want to share my experience because if I had read something that gave me useful tips I would been so grateful. The only things I read were for people that had to lighten their hair for it to take or could afford to have it done professionally. I can't afford to keep that up. This is so much cheaper and if you have patience or better yet someone who is willing to help you with the back then it's worth it.

My natural hair color is dark brown.

I did not have to lighten my hair before I dyed it red.

I didn't use a box from the grocery store.

I went to a beauty supple store.

I bought the following items:
gloves - a must - some might think this is a no-brainer but it's easy to forget, trust me
plastic applicator bottle with measurements on the side in ounces
hair clips
plastic comb
smock
coconut oil or vaseline

*L'Oreal Oreor 30 Volume Creme Developer 8 oz


*L'Oreal Excellence HiColor - in Red for Dark Hair Only


Follow the directions on the box. They are there it's just in very small print. I use the plastic applicator to measure the developer and the dye. I don't use a mixing bowl. I like to do it in the bottle and then you can just shake it up. Although this hair color is super thick. It does take time to mix this way. The hair color I listed above is brighter than it looks in the store or on the box. Plus the color I posted is of magenta not red. My hair has stayed brighter for much longer than I thought it would too. My hair works best when it's clean and dry; others hair works better when it hasn't been washed for a few days.

Before I dye my hair I put coconut oil (or vaseline) around my hair line, on my ears and on my neck. (another lovely tip from a gay man - different gay man) I comb the dye through small sections and then clip them to the top of my head. I start at the top and front and work my way back and underneath. I keep mine on for at least 30-35 minutes even though the box says 25 but that's because of the black parts of my hair. The first day the top of my hair is super bright red but it's less abrasive after your next wash but does not get dull.


The cool thing with this dye is that since you didn't need to lighten your hair beforehand, when your roots grow out it's not so noticeable PLUS when it starts to lighten it doesn't turn pink or orange. That's my favorite part.

Hope this helps - email me if you have any questions. I'm thinking of going auburn or magenta next.

you may also like:

January 13, 2011

Beauty Secret - Coconut Oil


So, as women we share our beauty secrets right? And not just women but even our fellow males the metro-sexuals and homosexuals - no?

If you know me in real life you've probably heard me rave about coconut oil. It's one of the best homeopathic slash natural remedies I have found that actually works. I use it for a billion things on a daily basis. I have a little jar of it I carry in my purse at all times. A large jar of it lasts a long time too even with as much as we use it.

Here are just a few ways I use it:

I use it for wrinkle cream around my eyes and on my neck
I put it on the psoriasis patches I have - which, by the way, rarely flare up when I do this
I use it for makeup remover
Instead of bath beads I put a tablespoon of this in a hot bath. It makes you feel silky smooth.
Great for lip balm
I'll put it on my cuticles after one of my at home manicures. My heels love it too.
Head wax - we use it on Tyrone's bald head when he shaves it
I put it on the ends of my hair when they're looking dry. I've tried using it as conditioner but it didn't work very well for me. Works great as a pomade though.
Use it as an ointment for cuts and bruises - helps speed up the healing process
 
My husband uses this almost as much as I do. He loves it too even though he doesn't have the stereotypical ashy skin that some african americans have (he's lucky). His skin is pefect - I kind of hate him too sometimes. I pray out children take after him.
 
It's interesting because it comes in a solid form but as soon as you touch it with your warm hands it melts really fast. It appears really greasy but it doesn't leave your skin feeling greasy (at least I don't think so). It really absorbs into your skin.
 
I've done a google search on this stuff and there are about a billion more things it supposedly aids in. I've heard if you eat it daily it helps you lose weight. I haven't tried it myself though - I probably should.
 
I thought this would be fun to share and may start this as a regular segment. I love hearing what others use. I actually love talking about makeup and stuff like this. It's def one of those darn girlie things about me.

What are your beauty secrets?

January 12, 2011

Manicure by Zen master flash

I told you I wanted to be a japanese nail technician.

Here's my easy at home manicure how-to.

Basic Tools:


1. Wood stick 2. Nail clippers 3. Cuticle clippers 4. Shea Butter 5. Nail file w/buffer 6. Cuticle Cream

Before: Sad and pathetic


I like to cut my nails short (I don't desire long nails like I use to because I use my hands way too much) and straight across and slightly rounded. I trim any hang nails or rough skin around the nail with my cuticle clippers. I don't actually cut my cuticles with them. I just push them back with a wooden stick. After I file down all of the rough edges I buffer each nail so that it's smooth.

Once the hard part is done I wash my hands off at this point before I put any moisturizer on and before adding any cuticle cream. Burts Bees Lemon Cuticle Cream is the best - seriously - I love it. I have a travel size one in my purse. It helps in the Winter time when your skin is extra dry (my cracks like crazy).

Sometimes I just stop right here but that's not any fun
After: I got a little crazy with the gold paint. You see I love the ghetto fabulous really long nails with the gems on them that have crazy airbrush designs. I could never pull it off. I would just end up gnawing them all down to tiny sharp stubs anyways.


A gold flag - how apropos?


I left my right hand untouched by the gold paint - not talented enough to paint with my left hand

Semi-related posts:

December 7, 2010

Weekly Confessional


I am a lip gloss addict. I preferably love them in little tins. They are my favorite.

I don't wear most of them. I do however carry most of them around in my purse. And the picture above is a only a handful of what I own. I have a bunch more floating around my entire life.


My favorite above all of them is burts bees - although it's not technically lips gloss, lip balm to be precise, it tops my growing obsession. There is something very orgasmic the way the peppermint tingles your lips yet quenches them at the same time.

I've thought about this way too much.

*Unrelated: We did our holiday card recently. I can't wait to send them out and then post about them. It's sort of a funny story.

August 27, 2010

The dreadful pink sponge curlers


OMFG! I havent seen pink sponge curlers since I burned the ones my mom made me where every single night in grade school.